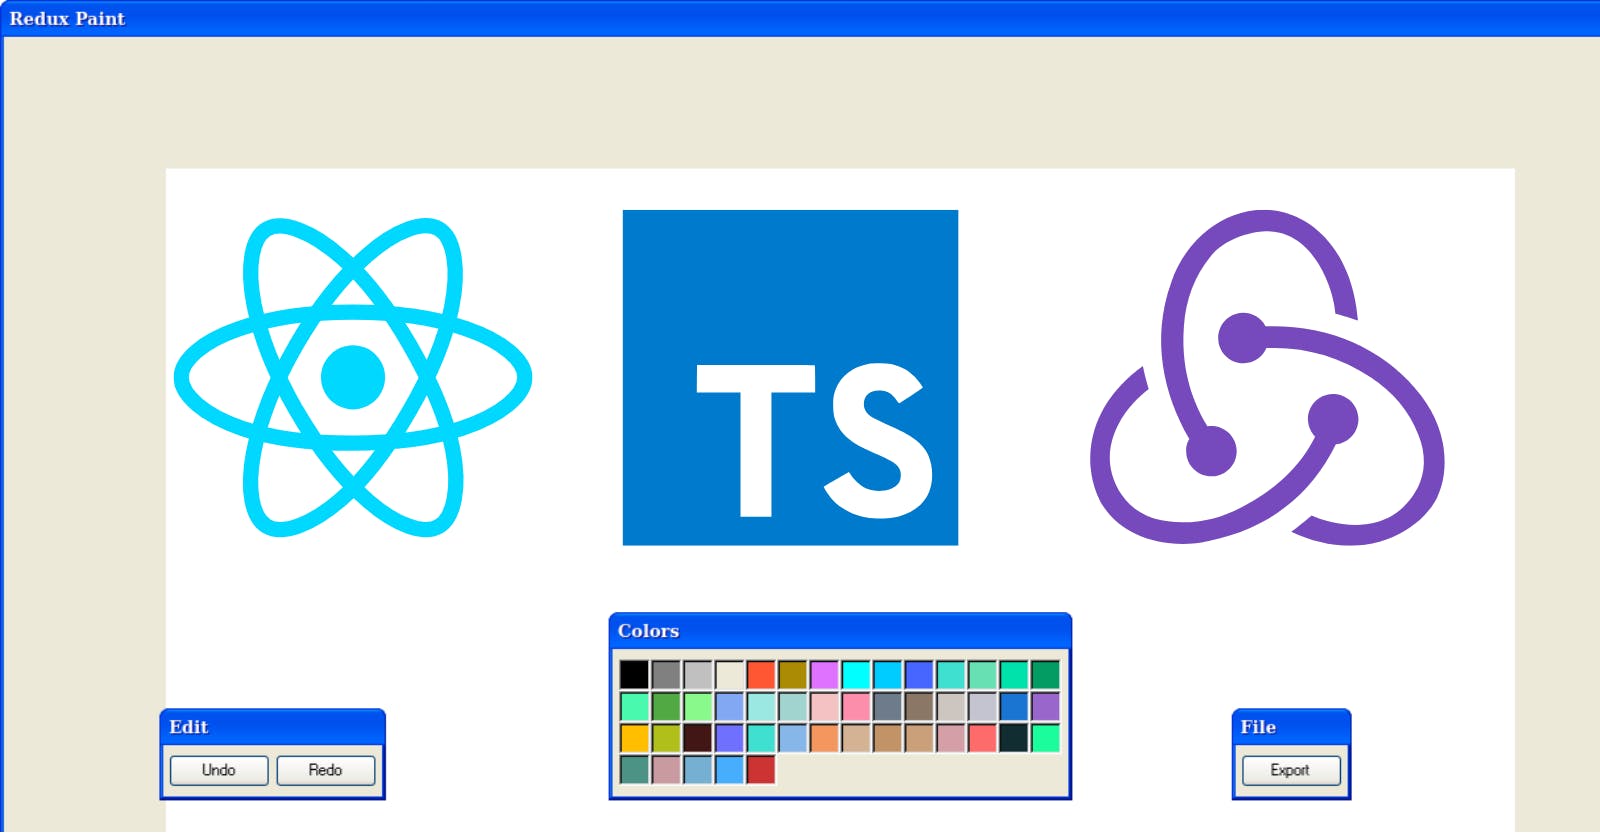


Drawing Board
Let's build an MS Paint inspired windows XP style drawing board.
Features:-
You can pick different colors and draw lines.
If you don’t like the results you can “undo” and “redo” the actions.
When you are satisfied with the results you can export the image as a .png file.
Technologies Used
React
TypseScript
Redux
Vite
Why Redux?
Redux is a state management framework that is based on the idea of representing the global state of the application as a reducer function.
So to manage the state you would define a function that would accept two arguments: state - for the old state, and action - the object describing the state update.
Now question arises:
Why not use React's useReducer to manage state?
Why do we need Redux if we have a native tool that allows us to represent the state as a reducer as well?
Well, Redux provides a bunch of important advantages:
Browser Tools. You can use Redux DevTools to debug your Redux code. It allows us to see the list of dispatched actions, inspect the state, and even time-travel. You can switch back and forth in the action history and see how the state looked after each of them.
Handling Side Effects. With useReducer you have to invent your own ways to organize the code that performs network requests. Redux provides the middleware API to handle that. Also, there are tools like Redux Thunk that make this task even easier.
Testing. As Redux is based on pure functions it is easy to test. All the tests boil down to checking the output with the given inputs. Patterns and Code Organization. Redux is well-studied and there are recipes for most of the problems.
Reviewing ancillary packages
Here's a list of some packages we will be using throughout our application that should allow us to write less code and focus more on our core business logic:
xp.css
We are going to use XP.css by Adam Hammad for our Windows XP styles.file-saver
FileSaver.js is the solution to saving files on the client-side, and is perfect for web apps that generate files on the client, However, if the file is coming from the server we recommend you first try to use the Content-Disposition attachment response header as it has more cross-browser compatibility.reduxjs/toolkit
The Redux Toolkit package is intended to be the standard way to write Redux logic. It was originally created to help address three common concerns about Redux:
- Configuring a Redux store is too complicated.
- I have to add a lot of packages to get Redux to do anything useful
- Redux requires too much boilerplate code
Development
Run this app: Completed Let's start coding our project :)
Start by installing a Vite react-ts template
npm create vite@latest drawing-board -- --template react-ts
Install all the packages
npm i xp.css file-saver redux-logger redux-devtools-extension @reduxjs/toolkit @types/file-saver
Let's visualize what we have to build:
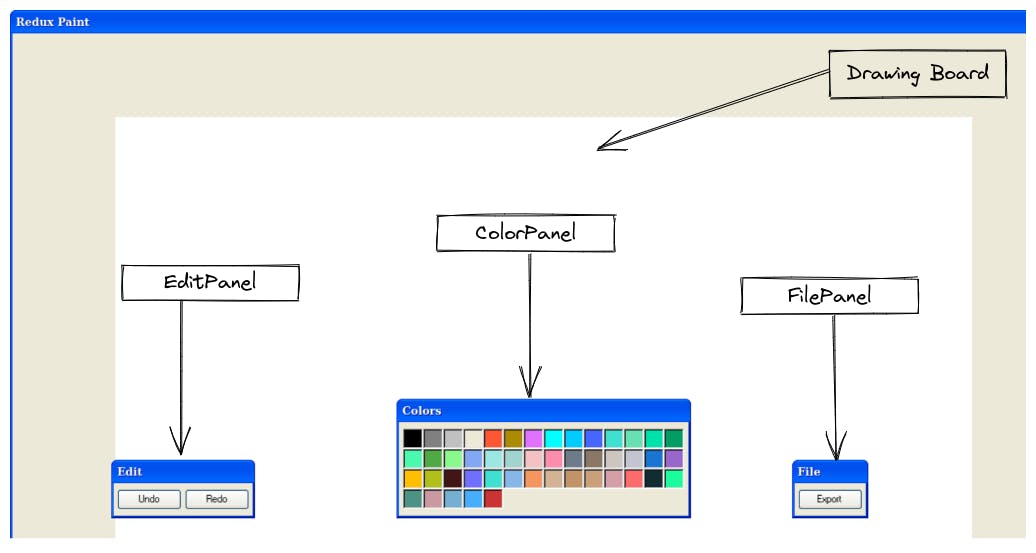
and here's the file tree
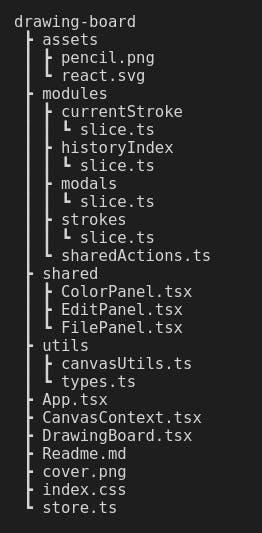
Code: refer this repository for full fledged code.
Let's update the App layout so that it resembles Windows XP styles and has a drawing board. We'll use the Canvas API to handle drawing
@import " xp.css/dist/XP.css"

canvas {
  transform: translate3d(-50%, 0, 0);
  cursor: url(./assets/pencil.png) 0 34, auto;
  margin: 100px 50%;
}
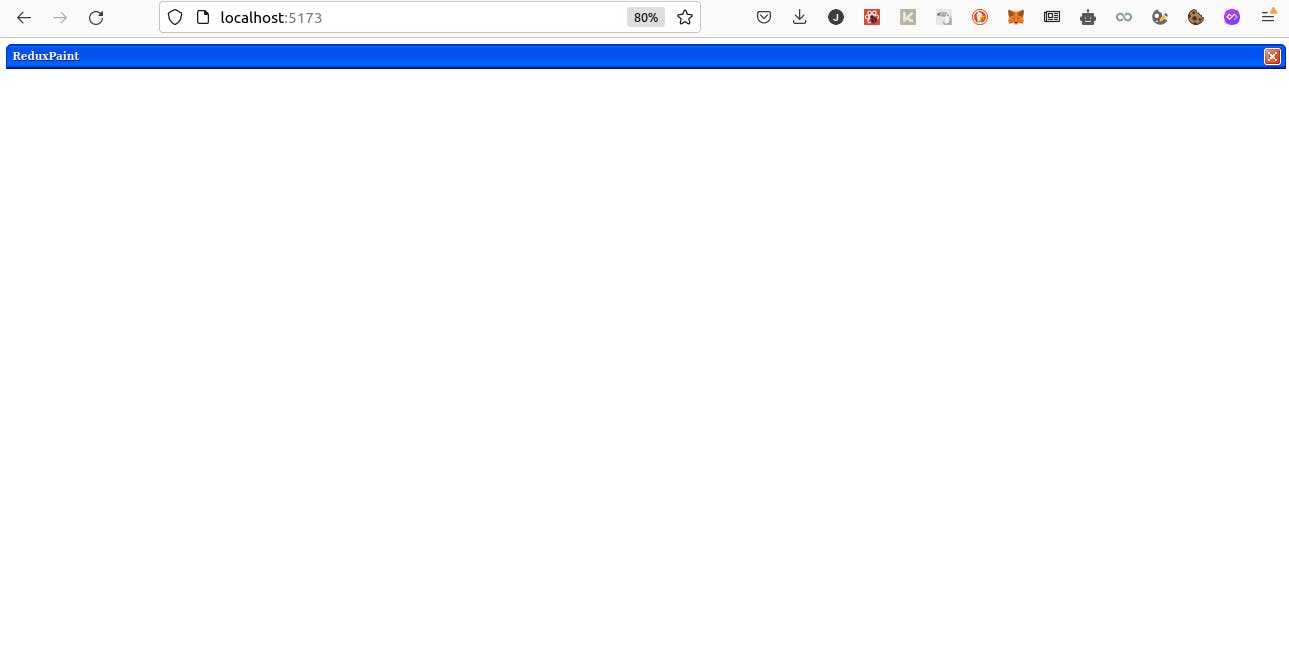
Now open src/App.tsx and change the layout
import React from "react"
function App(){
   return (
     <div className="window">
       <div className="title-bar">
       <div className="title-bar-text">ReduxPaint</div>
       <div className="title-bar-controls">
         <button aria-label="Close"/>
       </div>
     </div>
  </div>
   )
 }

export default App;
Utility Functions
Now let’s define some utility functions. Create a new file utils/canvasUtils.ts
drawStroke : This function receives the context that it will use for drawing, the list of points for the current stroke and the stroke color. After we finish drawing the stroke we need to call the closePath method.
clearCanvas : This function will fill the canvas with white color. We’ll use it to clear the canvas when we, for example, undo the strokes.
setCanvasSize : This function will adjust the canvas for the retina screen by setting the double pixel density.
getCanvasImage : This function resolves with canvas contents transformed into a Blob. Later we'll be able to save this Blob as a file.
import { Point } from "./types";

export const drawStroke = (
  context: CanvasRenderingContext2D,
  points: Point[],
  color: string
) => {
  if (!points.length) {
    return;
  }
  context.strokeStyle = color;
  context.beginPath();
  context.moveTo(points[0].x, points[0].y);
  points.forEach((point) => {
    context.lineTo(point.x, point.y);
    context.stroke();
  });
  context.closePath();
};

export const clearCanvas = (canvas: HTMLCanvasElement) => {
  const context = canvas.getContext("2d");
  if (!context) {
    return;
  }
  context.fillStyle = "white";
  context.fillRect(0, 0, canvas.width, canvas.height);
};

export const setCanvasSize = (
  canvas: HTMLCanvasElement,
  width: number,
  height: number
) => {
  canvas.width = width * 2;
  canvas.height = height * 2;
  canvas.style.width = `${width}px`;
  canvas.style.height = `${height}px`;

  canvas.getContext("2d")?.scale(2, 2);
};

// eslint-disable-next-line no-lone-blocks
{
  /* This function resolves with canvas contents transformed into a Blob. Later we'll be able to save this Blob as a file*/
}
export const getCanvasImage = (
  canvas: HTMLCanvasElement | null
): Promise<null | Blob> => {
  return new Promise((resolve, reject) => {
    if (!canvas) {
      return reject(null);
    }
    canvas.toBlob(resolve);
  });
};
and let's define the type for our state. Create a new file types.ts in utils folder.
RootState three fields:
• currentStroke - an array of points corresponding to the stroke that is currently being drawn.
• strokes - an array of already drawn strokes
• historyIndex - a number indicating how many of the strokes we want to undo.
Stroke: Each stroke has a color represented as a hex string and a list of points, where each point is an object that holds the x and y coordinates.
Point : Points contain the vertical and horizontal coordinates.
import { ModalState } from "../modules/modals/slice";

export type RootState = {
  currentStroke: Stroke;
  strokes: Stroke[];
  historyIndex: number;
  modalVisible: ModalState;
};

export type Stroke = {
  points: Point[];
  color: string;
};

export type Point = {
  x: number;
  y: number;
};
**Don't worry about {ModalState} , we're going to define it when we'll code our Redux logic.
Redux Logic
Redux-Toolkit provides a createSlice function that automatically generates action creators based on the reducer handles we have. So we will use that instead of typical Redux logic which consists of actions and reducer handlers for them separately.
In modules/sharedActions.ts
We are going to start with the endStroke action, it is going to be used by multiple reducers so we’ll define it in a shared module.
import { createAction } from "@reduxjs/toolkit";
import { Stroke } from "../utils/types";

export type SharedAction = ReturnType<typeof endStroke>;

export const endStroke = createAction<{
  stroke: Stroke;
  historyIndex: number;
}>("endStroke");
Similarly, we'll define other logic in the modules folder, the source code of which you can find here Code.
Let's write src/store.ts
import { configureStore } from "@reduxjs/toolkit";
import { logger } from "redux-logger";
import historyIndex from "./modules/historyIndex/slice";
import { currentStroke } from "./modules/currentStroke/slice";
import strokes from "./modules/strokes/slice";
import { modalVisible } from "./modules/modals/slice";

export const store = configureStore({
  reducer: {
    historyIndex,
    currentStroke,
    strokes,
    modalVisible,
  },

  middleware: (getDefaultMiddleware) => getDefaultMiddleware().concat(logger),
});
Modals
Now come our modals, i.e FilePanel, EditPanel and ColorPanel which will let us perform save, undo/redo, and change colors actions respectively.
In src/shared/FilePanel.tsx
The FilePanel component will contain the code that will get the binary data from the canvas and save it into a file. To save the data into a file we’ll use the file-saver package.
Here we get the reference to the canvas using the useCanvas hook. When the user clicks the button we call the exportToFile function. There we generate the Blob from the canvas using the getCanvasImage function and then we save it to a file using the file-saver package.
import { saveAs } from "file-saver";
import { useCanvas } from "../CanvasContext";
import { getCanvasImage } from "../utils/canvasUtils";
import React from "react";

export const FilePanel = () => {
  const canvasRef = useCanvas();

  const exportToFile = async () => {
    const file = await getCanvasImage(canvasRef.current);
    if (!file) {
      return;
    }
    saveAs(file, "drawing.png");
  };

  return (
    <div className="window file">
      <div className="title-bar">
        <div className="title-bar-text">File</div>
      </div>
      <div className="window-body">
        <div className="field-row">
          <button className="save-button" onClick={exportToFile}>
            Export
          </button>
        </div>
      </div>
    </div>
  );
};
Look for EditPanel and ColorPanel here: Code
App Component
Now that we have all the components and logic written out, let's implement it and update our App.tsx file.
import { clearCanvas, drawStroke, setCanvasSize } from "./utils/canvasUtils";
import React, { useEffect } from "react";
import { useSelector, useDispatch } from "react-redux";
import { beginStroke, updateStroke } from "./modules/currentStroke/slice";
import { endStroke } from "./modules/sharedActions";
import { strokesSelector } from "./modules/strokes/slice";
import { currentStrokeSelector } from "./modules/currentStroke/slice";
import { historyIndexSelector } from "./modules/historyIndex/slice";
import { ColorPanel } from "./shared/ColorPanel";
import { EditPanel } from "./shared/EditPanel";
import { useCanvas } from "./CanvasContext";
import { FilePanel } from "./shared/FilePanel";

const CANVAS_WIDTH = 1024;
const CANVAS_HEIGHT = 768;

function App() {
  const canvasRef = useCanvas();

  const getCanvasWithContext = (canvas = canvasRef.current) => {
    return { canvas, context: canvas?.getContext("2d") };
  };

  // to prepare the canvas for drawing when we open the app
  useEffect(() => {
    const { canvas, context } = getCanvasWithContext();
    if (!canvas || !context) {
      return;
    }
    setCanvasSize(canvas, CANVAS_WIDTH, CANVAS_HEIGHT);

    context.lineJoin = "round";
    context.lineCap = "round";
    context.lineWidth = 5;
    context.strokeStyle = "black";

    clearCanvas(canvas);
  }, []);
  //set the canvas side to the predefined values,
  //we set the strokes style and then we clear the canvas, preparing it for the first strokes.

  const currentStroke = useSelector(currentStrokeSelector);

  const isDrawing = !!currentStroke.points.length;
  const historyIndex = useSelector(historyIndexSelector);
  const strokes = useSelector(strokesSelector);
  const dispatch = useDispatch();

  // side-effect to handle the currentStroke updates.
  useEffect(() => {
    const { context } = getCanvasWithContext();
    if (!context) {
      return;
    }
    requestAnimationFrame(() =>
      drawStroke(context, currentStroke.points, currentStroke.color)
    );
  }, [currentStroke]);

  // Canvas Events
  const startDrawing = ({
    nativeEvent,
  }: React.MouseEvent<HTMLCanvasElement>) => {
    const { offsetX, offsetY } = nativeEvent;

    dispatch(beginStroke({ x: offsetX, y: offsetY }));
  };
  const endDrawing = () => {
    if (isDrawing) {
      dispatch(endStroke({ historyIndex, stroke: currentStroke }));
    }
  };
  const draw = ({ nativeEvent }: React.MouseEvent<HTMLCanvasElement>) => {
    if (!isDrawing) {
      return;
    }
    const { offsetX, offsetY } = nativeEvent;

    dispatch(updateStroke({ x: offsetX, y: offsetY }));
  };

  //useEffect that will observe the historyIndex value:
  useEffect(() => {
    const { canvas, context } = getCanvasWithContext();
    if (!context || !canvas) {
      return;
    }
    requestAnimationFrame(() => {
      clearCanvas(canvas);

      strokes.slice(0, strokes.length - historyIndex).forEach((stroke) => {
        drawStroke(context, stroke.points, stroke.color);
      });
    });
  }, [historyIndex]);
  //Every time the historyIndex gets updated we clear the screen and then draw only the strokes that weren’t undone.

  return (
    <div className="window">
      <div className="title-bar">
        <div className="title-bar-text">Redux Paint</div>
        <div className="title-bar-controls">
          <button aria-label="Close" />
        </div>
      </div>
      <EditPanel />
      <ColorPanel />
      <FilePanel />
      <canvas
        onMouseDown={startDrawing}
        onMouseUp={endDrawing}
        onMouseOut={endDrawing}
        onMouseMove={draw}
        ref={canvasRef}
      />
    </div>
  );
}

export default App;
Wrap the App component in Provider and CanvasProvider in index.tsx and update all the CSS from the source code.
Deployment
Deploy the app on Vercel or Netlify or any hosting provider of your choice.
Conclusion
Take a break! You did a great job building this project.
With this tutorial, you now have understood
How to code in React with TypeScript and using types.
How to use Canvas API.
How to use Redux Toolkit for state management.
Credits
Maksim Ivanov
If you liked this blog, consider following me here and on other social media platforms.
Bye!